Re-Relish

I know I have posted at least two blogs on the subject of  Relish, but there are just so many delicious relishes out there that I want to add at least one more. I received e-mails asking for different relishes. It is the time of year when ingredients in most relishes are harvested and sold; from a road side shed, a Farmers Market or even your favorite grocers. There are plenty of things to find and create your favorite reslish.

roadside2

Seen on the side of many roads

Some are already published, but get lost in the numbers and others are not published. I got a e-mail from Linda Meredith asking for Chow Chow and Corn Relish. Chow Chow is in an old blog but Corn is not. Here is the link if you wish to go back for Chow Chow. But
one rule…you have to come back and finish reading this blog. 
https://canucanit.wordpress.com/2012/10/17/time-to-chow-down-on-chow-chow/ .

Chow Chow

Chow Chow

 I sent her the recipes and hope she has good luck figuring out my talking and recipes. She also said it would be OK to say that she asked. I love this, as so many people are afraid to see they name in print. Like maybe someone they know might see it, or more importantly, someone they don’t. I think the only thing she might need to worry about is a flood of ads for everything known to man. Well enough talking about negative things, I just saw “Kelley’s Heroes” and they talked about  Negative Waves causing things to happen. Well no more Negative Waves. Only “Positive Waves”. All the relishes in this blog may be unusual for you, but they are not in the part of the country where I live (Georgia). I hope you find a couple that you will love and make over and over. You can always change the recipe to suit you or your family. Everybody does. One other thing before we start. I suggest you use 8 ounce canning jars to start. If your family likes the relish like ours then use 16 ounce jars next time.

The most positive wave I can thing of is Corn Relish or Sweet Corn Relish. Before you go to the grocery store and buy 8 – 10 ears of corn, check your home area and see if some local farmer is set up on the side of the road or car port selling corn that he or she grew. Or you call the Dept. of Agriculture in your state, and ask them if they know, or have a list of produce sellers. Our state has a bulletin they send out with all types of farmers or others that grow and sell many different things. I realley enjoy reading the Farmers Market Bulletin. There is nothing that can top fresh corn in taste. We have a farmer that has about 2 acres where he grows corn and tomatoes, not to mention the other small crop items he has. Check out the misc. for sale in the local paper. If you live where nothing is growing, I am truly sorry for you. If that is the case look and see if you have a state farmers market. If all  these fail pick the freshest from your grocers bin or frozen foods section. Always check when the growing season starts. Look around ask friends if they know someone growing things. Make a note on the side of your fridge for next year. Well let’s get busy with this years produce.

Corn Relish

Corn Relish

Corn Relish: This is a wonderful treat and it can be made from fresh corn or frozen corn, sorry no canned. With that covered, let’s get cooking! 

3 cups bell peppers, red & green – chopped finely,   3 pounds corn, frozen (2 large packages), 1 teaspoon parsley, chopped, 7 cups onions, chopped, 2 cups brown sugar, 2 cups corn syrup, 2 tablespoons salt, kosher or canning, 2 tablespoons dried mustard, 7 cups cider vinegar, 1 cup water, 1/2 teaspoon turmeric, 1 tablespoon mustard seeds, 1 tablespoon celery seeds, 1/2 cup celery, chopped, 1 tablespoon citric acid or fresh lemon juice. Mix all ingredients in large pot (make sure it is not an aluminum pot. The vinegar will react with the metal and change the taste. Bring to boil, cooking covered for 15 minutes.

Debubbler3

Remove bubbles with a plastic spoon handle

Do a Hot-Pack (relish still hot from cooking) into canning jars that have been boiled to sterilize them. Even if you just opened a box, look at the dust and other things in the box. take a plastic spoon and go around the edge of the relish and make sure the air is out of the jar. Put relish up to with 1/4 inch of the top. Leave this space, it is needed in the canning process. Clean the rims with a clean paper towel. Place cleaned domes on top. Screw on the ring to seal the jar. Do not screw on too tight, or too much and the air in the jar can’t escape in the boiling process. Not enough and water will leak in and spoil your hard work.Adjust finger-tight is needed.

Canning Pot with rack

Canning Pot
with rack

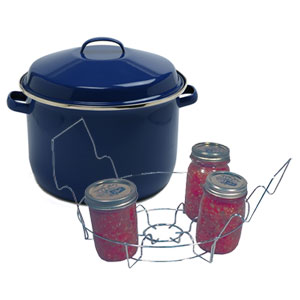
To do proper canning you need a Canning Pot. They are available at most the same stores where you buy jars. No luck check a hardware store (not a super store). Place jars in a boiling water bath using a rack or something that will keep the jars from touching the bottom. Process 15 in a boiling water bath, with time starting after the water comes back to a boil. Make sure the water is at least two inches over the jar tops. After time is up, lift out the rack or jar gripper, remove jars and let cool. During this time you will probably her popping sound. This is the jars sealing and that means it worked. After they are cool check to make sure they all are sealed. Waait for one day to be sure. If not, remove the ring and replace the dome, then ring again. The jars have to be reprocessed again or eaten. It is up to you. I know that is a lot, but good canning is not easy. If it was  everybody would do it and the grocery store shelves would be  empty, then they would have to find other things to sell. To make Hot Corn Relish  just use some hotter peppers such as Jalapeno or Habanero in addition to the Bell Pepper. Keep the bell peppers they add such a great color and a nice taste addition.

Black Eyed Pea Relish

Black Eyed
Pea Relish

Next up is a favorite around here, not so sure in other areas of the country. We are going to make Georgia Caviar (or could be called Black Eyed Pea Relish). This is not named after a singing group, it is named after a food staple in the south. A nice thing about this relish is it is made from canned vegetables.

3 cans black-eyed peas, drain and
rinsed. 1  jar pimento strips, chopped, add juice also. 1/2 bunch scallion tops, thinly sliced. 1 teaspoon oregano. 1 teaspoon Texas Pete Hot Sauce (not Tabasco sauce it has a large amount of  salt). 1 teaspoon black pepper, 1 bell & jalapeno pepper, seeded and chopped. 1/2 tomato, firm, chopped (use the other for a tomato sandwich. 1 cup vinegar. 1 clove garlic, minced. Combine all ingredients, cook for 5 minutes.
Put in canning jars, process 10 minutes. Using the same method as above. Garnish with fresh chopped onions or parsley or for that matter don’t. We are really cooking now (pun intended). Both of the relishes so far are not familiar to many people. You really should try them they are great!

Wonderful Garlic

Wonderful
Garlic

Garlic Relish is something we made just to try. It was such a major taste treat that we had to try to sell it. Who knew it would become one of our top three relishes. (for your information the top three in sales were Chow Chow, Habanero Relish and Garlic Relish. Well now here is the recipe: 1/2 cup white vinegar (not cider vinegar. It changes the taste). 1/2 cup sugar.  1/2 cup garlic – minced. 1/3 cup bell peppers, red, chopped finely. 1/3 cup cubanelle (or other medium hot peppers), chopped finely. 1/3 cup bell peppers, yellow -chopped finely. 1/2 teaspoon dried pepper flakes. 1/4 teaspoon salt, kosher or canning. 1/4 teaspoon citric acid or fresh lemon juice. Bring vinegar and sugar to boil. Add garlic, simmer 25 – 30 minutes. Add peppers, onion and remaining ingredients. Simmer for 15 minutes. Put in 8 ounce canning jars. Process 15 minutes in water bath using above method. This is good with cream cheese or can be used in cooking. Take a
fresh baking chicken and rub the inside of the chicken with relish, leaving excess. Rub out side as well. Place in baggie and let sit over night in the refrigerator. Then roast or put on a grill. The taste will be unbelievable. Another note, use a disposable glove to
do the chicken rub. While we are making unusual relishes how about

Jerusalem-Artichoke Relish


Jerusalem-Artichoke Relish

Artichoke Relish: This is another from canned ingredients. If you change the volumes to make smaller amounts, keep proportions the same. 5 cups artichokes, (3 14 oz. cans), drained and chopped. 5 cups artichoke hearts( 3  14 oz cans), drained and chopped. 3/4 cup onion – finely chopped. 1/4 cup parsley, chopped. 1/2 cup celery, chopped. 1 cup bell peppers, green – chopped. 1 cup bell peppers, red – chopped. 1 1/2 cups sugar. 2 cups vinegar – white. 1/4 teaspoon turmeric. 1 tablespoon mustard seeds. 1 teaspoon celery seeds. 2 tablespoons dried onion flakes. 1/4 teaspoon kosher salt, or canning salt. Combine all ingredients in large non-metal pot, bring to boil, simmer for 10 minutes. Hot pack in 8 ounce canning jars. Process 20 minutes in water bath. Using the above procedure. I am sure that if you try this one, it will become a favorite. Next is a big hit with the hot dog crowd.

Vidalia Onion Relish

Vidalia
Onion Relish

Vidalia Onion Relish (or Sweet Onion). We serve it right along with the Habanero relish on dogs and burgers. Of course we also add more fresh onions. We also serve this as a side dish. You can never get too much onions on food or with food as far as I am concerned.
1 cup bell peppers  green – chopped. 1 cup bell peppers, red – chopped. 1/4 cups sugar. 1 teaspoons kosher salt, or canning salt. 1 cup cider vinegar. 1/4 cup jalapeno peppers, seeded and chopped. 1 1/2 cups Vidalia Onions – finely chopped. 1 teaspoons pickling spice. Cover chopped vegetables with boiling water; let stand 5 minutes. Drain. Tie pickling spice and hot peppers in cheesecloth bag. Add spice bag, sugar, salt to vinegar; simmer for 15 minutes. Remove spice bag. add vegetables, simmer for 10 minutes. Hot pack in canning jars. Process 15 minutes in water bath. Use the same procedure as above. You can use another variety of onions, just think about the taste first.

Indian Relish

Indian
Relish

OK, just one more quickie. My word
number is adding up to an area that bloggers have been told you won’t read anything higher than this number. Personally, I have not found that the case. But here goes my last one for this blog. I will close with

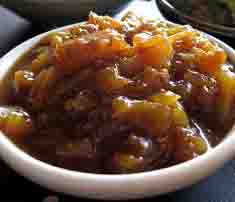
Indian Relish: 3 green Tomatoes. 4 tart, cored and peeled apples (Granny Smith is best). 1 Onion (Vidalia or Yellow will do nicely). 2 cups cider vinegar. 1/4 teaspoon red pepper flakes. 2 cup sugar. 1 teaspoon fresh chopped ginger (this is important in the taste). 1/4 teaspoon turmeric. 1/2 teaspoon salt, kosher, sea or canning. Combine all ingredients in large pot, bring to boil, reduce heat and cook for 1/2 hour. Pack into jars and process for 10 minutes in boiling water bath. Like all others, use the top recipe method for processing. Don’t want a red relish, use green tomatoes. Makes it more tart. Want sweet try a Fuji or Gala apple. Want it hotter use jalapeno or Habanero peppers. Some people call this a chutney, but that is OK with me as long as they make and eat it. You can call it your relish or chutney. You are the cook! Grandma would be happy with this blog. We got back to the basics, the things that Mary Lynn and I made a great business from.

Also don’t forget to check out my new blog dedicated just to Salsa. I have recipes for make and eat as well as canning recipes. I will also tell you when a recipe is just for make and eat with a chip. The site is www.canusalsa.com Stop in and check it out. From the looks of the numbers not many are looking. Hard to believe with so many request for salsa recipes that you have not at least peaked. Well there is no time like now as we are at the end of this blog. Bookmark it in your computer, or better still subscribe and you will get new blogs e-mailed to you. While you are at it, subscribe to this blog also.

To make sure that you are keeping up with the latest from both blogs all you have to do is click the subscribe (on the Salsa page it says follow along) bottom on the right and fill in your e-mail address and every blog from that day forward will be sent to your mail box. Really makes it easier to read and keep up. You never know what will come up next. I say that because I don’t know what is next!

Don’t forget…. let me know what you would like to make or any ideas you have for the
next blog. Also if you have any questions you would like me to try to solve. Just drop me a note at jellymanga@gmail.com.

Don’t keep my blogs a secret, pass the word on to your friends, neighbors and family
members. 
They just might make something and share with you. Please feel free to
share my blog on Facebook or Twitter or even MySpace.com. I want to get as many people exposed to the good things as possible. So share and ask your friends to share, PLEASE.
I have always heard that the best advertising was word of mouth. Now days, maybe word of e-mail or text fits in. Anyway you want to pass the word on is GREAT.

Don’t forget, if someone asks you can you can
it? Jellyman Hat

Say YES I can can it.

Posted in Apple, Award Winning, Best of Show, Canning Jars, Canning Salt, Celery, Chipolte Peppers, Chow Chow, Clove of Garlic, Cooking, Corn Relish, Family Tradition, Food Preservation, Garlic, Georgia National Fair, Ground Ginger, Habanero Peppers, Home Made, Hot, Hot Biscuits, Hot Pack, Kosher Salt, No artifical ingredients, No preservatives, North Georgia, Old Fashioned | Tagged , , , , , , , , , , , , , , , , , , , , , , , , , , , , , , , , , , , , , , , , , , , , , , , , , , , , , , , , , , , , , , , , , , , , | Leave a comment

Peter Piper has nothing on me!!!!!

I have done a blog about pickling in the past, but that was a long time ago. Some that are new to my blog don’t go back and look at some of the older blogs. They may not be as much fun as my new blogs but they still have good information about canning.

Peter Piper

Peter and his Peck of Peppers

peter-piper2

Peter and his Peck of Peppers

In the blog I am going to attempt to do what Peter did. You remember him, he picked a peck of pickled peppers. First question that some are now goggling, what is a peck? Well in days gone past a peck was a unit of measure. Sort of like a quart to a gallon. I hope most of you know what a bushel is, well it takes 4 pecks to make a bushel. Like it takes 4 quarts to make a gallon. A peck is in dry measurement. Sort of like your yard is a 1/2 acre or smaller or bigger. So the next time you go to the grocery go to the produce section and look for things in large baskets. More than likely that is a bushel. If you are not sure ask the Produce Manager and he/she/they will show you. Now in your mind divide that by 4 and you will get a Peck. So pick up a bag to put your tomatoes in and that bag might be a peck, or even a half a peck if you only want a few. You now have a idea how much Peter Piper picked.

To get started how about pickling a pepper???? After all that explanation I have to start with peppers. But I will including other things to make you want to try them all…….PLEASE.

Pickled Hungarian or Banana Pepper

Pickled Hungarian or Banana Pepper

PICKLED PEPPERS: 4 quarts long red, green or yellow peppers (Hungarian, Banana or other varieties). One alternative is to slice peppers and use them. 1 1/2 cups canning salt. 4 quarts plus 2 cups water, divided. 1/4 cup sugar. 2 tablespoons prepared horseradish. 2 cloves garlic, peeled. 10 cups white vinegar, not cider. 1 case of quart canning jars. Do not use other types of jars (jelly or mayo) these jars will break and destroy your effort.

Pickled Sliced  Peppers

Pickled Sliced Peppers

Cut two small slits in each pepper. Dissolve salt in 4 quarts water. Pour salt water mixture over peppers and let stand 12 to 18 hours in a cool place. Drain; rinse and drain thoroughly. You may have to rinse and drain 2 times. Combine 2 cups water and remaining ingredients in a large sauce pot. Simmer 5 minutes. Remove garlic cloves. Bring pickling liquid to a boil. Pack peppers into hot jars, leaving 1/4 inch head-space. Ladle hot liquid over peppers, leaving 1/4 inch head-space. Remove air bubbles with a wooden stick or plastic stick. Adjust two-piece caps (dome and ring that have been washed and dried earlier). Process 10 minutes in a boiling-water canning pot with at least 2 inches of water over the tops of the jars. Don’t start the timer till the water begins to boil. Remove carefully and let sit on a towel or cooling rack. When the jars are completely cool to the touch, check to make sure the jar is sealed (the dome is inverted). If not, the jar has to have a new dome and go thru the boiling water process again.

When jars are cooled place in a cool dry area for about two weeks for the pickling process to become complete. After opening, jars need to be enjoyed in all sorts of ways. Pickled peppers is the first way, but using the vinegar on your greens or as a spicy salad dressing comes to mind. The vinegar still is vinegar, but it has the flavor of the peppers added. Chop the peppers into small pieces and sprinkle onto your pizza after its cooked. Delicious

How about that!!!! Now you know what Peter was up to in the nursery rhyme. All these years and you never knew. What else is hidden in those childhood stories?

Pretty easy wasn’t it? Well the next one will require more hands on and more time on your part but the results will be something that will amaze your family and friends.

Piickled Okra

Pickled Okra

PICKLED OKRA: 12 pounds okra, 1/2 bushel. Only use young medium to small okra for pickleing. The larger one don’t pickled as good. Take a sharp knife and make a tiny hole in the side of the okra for better pickling. 1 gallon cider vinegar, not white vinegar. 1 gallon water. 1 1/2 cups canning salt. 24 cloves garlic, peeled. 24 sprigs fresh dill. 12 teaspoons dill seeds. 12 teaspoons dill weed (if fresh not available). 24 jalapeno peppers, sliced in half. 12 teaspoons cayenne powder. 12 teaspoons dried pepper flakes. You can get that amount of fresh dill sprigs from the produce manager, just ask and he will tell you if he has it on hand or will take a day or so to get.
In each jar put 1 sprigs dill weed, 1 clove garlic, 1/2 teaspoon dill seeds, 1/4 teaspoon cayenne powder and 1/4 teaspoon dried pepper flakes. Also put 1 jalapeno pepper, sliced in half in each jar. If fresh dill is not available, 1/2 teaspoon dill weed. Add garlic glove. Scrub and rinse okra well. Pack okra into jars careful to stay below line. Meanwhile heat the vinegar, water and salt to boil. Keep on low while you fill jars. Remember not to go above the line (1/2 inch below top of jar). Tap out any air bubbles. Process in water bath for 10 minutes. When you take the rack out of the water let the tops “pop” before you try to move them to the cooling rack. Follow the same instructions as above. Age for 2 weeks.

Great pickles for the people that like okra and a surprise for those that do not. Try them they are awesome. One of my favorites and one that my grandmother would always have on her table. She would have a pickle dish with just okra on it. She would have other pickles on another dish. She was a real Southern Lady and always had a pretty table for every meal. I learned my early canning from her and have followed her rules the rest of my life. I hope she would be happy with what I have done in my life as far as canning and other things. Grandma Austin, you will live on in all my recipes!

We did a easy pickle and a hard pickle. How about a pickle that is the easiest of all my pickles!!!!

Pickled Beets

Pickled Beets

PICKLED BEETS: Put on a pair of dis possible gloves before you start. Beets are messy! 3 cups Vidalia onions, sliced. 4 quarts beets, peeled, cooked, sliced or 2 No. 10 cans. 2 cups beet juice, from No. 10 cans. If you cook the beets save 2 cups of the juice. 7 cups white vinegar. 4 cinnamon sticks. 4 cups sugar.

Pickled Beets in pickle dish

Pickled Beets in pickle dish

1 tablespoon whole cloves. 1 tablespoon whole allspice. 1 tablespoon pickling spice. 1 tablespoon salt (kosher or canning salt needed not table salt). 1 tablespoon peppercorns. Combine vinegar, beet juice (if using cooked beets use 2 cups water from cooked beets), sugar, cinnamon sticks and spices. Put cinnamon sticks and spices in a spice bag. Add salt in large sauce pot. Simmer 15 minutes. Remove spice bag and cinnamon sticks. Pack beets and onion slices into 16 ounce canning jars. Pour hot liquid over beets. Be sure to leave 1/2 inch air space on top. Remove air bubbles with probe. Process in boiling water bath for 15 minutes. The onions are needed for flavor not heat. So Vidalia or Sweet Onions are necessary. After boiling let set till completely cool then store in a cool dry area. After opening keep in the refrigerator till jar is empty. Don’t throw away the liquid. You can reuse it again with a small can of sliced beets. Just drain the beets and a few onion rings put into the liquid. Tighten the lid and let set for a couple of weeks. You can do that at least 2 times with the juice. Just fill with a little extra vinegar to make up the liquid. Impossible to get any easier!!!!!!!

I am going to finish up with something a little unusual for you. Try it, you might like it. If not you haven’t lost a big amount of ingredients or time. Everybody that has tried them has liked them, some have even loved them. Again, it is like many things, you may or may not like it.

Sweet Cucumber and Green Tomatoes Pickles

Sweet Cucumber and Green Tomatoes Pickles

SWEET CUCUMBER AND GREEN-TOMATO PICKLE: 1 quart thinly sliced unpeeled
cucumbers. 1 quart thinly sliced very green tomatoes. 2 cups thinly sliced white onions. 1 cup canning or kosher salt, not table. 1 cup sugar. 2 cups cider vinegar. 1 tablespoon whole mustard seed. 1/2 teaspoon whole celery seed. 5 or 6 whole black peppercorns. 1/2 teaspoon ground turmeric.
Arrange alternate layers of cucumbers, green tomatoes, onions and salt in a bowl. Let stand six to eight hours, or overnight. Drain. Combine the remaining ingredients in a four-quart kettle and bring to a boil. Add the cucumbers, tomatoes and onions and boil until the vegetables are clear, five to ten minutes. Pack in hot sterile jars and seal at once. Process in boiling water bath like above recipes. Process 10 minutes. Let set for at least a week to come to full flavor. Serve cold.

Well I hope that I have given you some pickling ideas, some strange and some not so strange. Some as easy and opening a can and others with more hands on needed. Both with tons of flavor and will be enjoyed by many.

Family enjoying your cooking

Family enjoying your cooking

I have other recipes about pickling and many other ideas. Take several minutes and look thru my list. I hope you will try something and when you do you will realize the rush of enjoyment when your family and guests love your cooking. Few things can compare to that tingling you get when your personal family goes crazy about something you made by not opening a can from the store.

I know I keep saying this, but it is true. Seems like we just started and it is time to wrap it up. Hopefully you got some ideas to try in the future. Don’t be afraid to cook. Some of the worst mistakes made in kitchens become family favorites. Not all of them, but some of them. So experiment, you are the cook. Being the cook means you make the choices just how much to add or make. The only cooks that can’t cook are the ones that don’t imagine. People ask my how we come up with so many recipes. I tell them that it was easy, we just think of a taste or flavor and made something to match. It was not hard. Everything should be in your mind’s eye before you cook it. The more you think the better it gets. How do you think we got so many things to eat. Some one had to think them up and then cook their ideas.

Also don’t forget to check out my new blog dedicated just to Salsa. I have recipes for make and eat as well as canning recipes. I will also tell you when a recipe is just for make and eat with a chip. The site is www.canusalsa.com Stop in and check it out. From the looks of the numbers not many are looking. Hard to believe with so many request for salsa recipes that you have not at least peaked. Well there is no time like now as we are at the end of this blog. Bookmark it in your computer, or better still subscribe and you will get new blogs e-mailed to you. While you are at it, subscribe to this blog also.

To make sure that you are keeping up with the latest from both blogs all you have to do is click the subscribe (on the Salsa page it says follow along) bottom on the right and fill in your e-mail address and every blog from that day forward will be sent to your mail box. Really makes it easier to read and keep up. You never know what will come up next. I say that because I don’t know what is next!

Don’t forget…. let me know what you would like to make or any ideas you have for the next blog. Also if you have any questions you would like me to try to solve. Just drop me a note at jellymanga@gmail.com.

Please feel free to SHARE my blog on Facebook or Twitter or even MySpace.com, or any place else you can think. I want to get as many people exposed to the good things as possible. So share and ask your friends to share, PLEASE.

They just might give you something that they made to say thanks for the share. Don’t keep my blogs a secret, pass the word on to your friends, neighbors and family members.Jellyman Hat

Don’t forget, if someone asks you can you can it?

Say YES I can can it.

Posted in Home Made | Leave a comment

Hurry up and do nothing, or maybe just a little

Peanut Butter and Jelly

America’s Favorite Peanut Butter and Jelly

I get ask all the time if there is anything that someone can make that doesn’t take a long time and a whole big pile of equipment. I have the best answer that they could ask for, I tell them that there are many things that they can make and enjoy that doesn’t take time, just a small amount of equipment and money. The first thing you should think about is what does my family enjoy and eat the most? Do you have a big peanut butter and jelly crowd or is it more to toast and jam, how about a bagel with cream cheese and jam. Either way, there are things to make that are delicious and easy.

Cooking Pot

Heavy Duty Cooking Pot

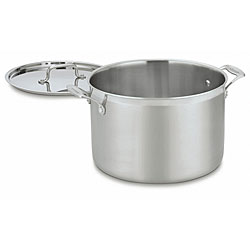
First step is ask everybody what their favorite is, then second favorite. From this list you can get a good idea what to make. Don’t forget to add your favorites to the list, you count also. Now that you have an idea what to cook the next thing to do is go into your kitchen and find a few things. First and most important is a good pot to cook with. This should be a heavy-duty pot (do not use the light weight aluminum pots they tend to stick and burn. After all the effort you have put out, you don’t want it to be spoiled because the jelly or jam stuck to the pot and burned. Most folks will have something that will work. If not check at your local thrift store or Goodwill stores, they usually have all sorts of pots and pans that will do the job and they don’t cost much. Sure it is used, but you are going to clean it really good before you use it. Not to mention the cost of a new pan vs the thrift store one.

Time GroupNext you will need a small timer (important because some thing really need to be timed exactly). You might already have one in a drawer that was stuck there to keep out-of-the-way till you need it. Well time to dig it out, you need it.

Wooden spoons

Long handle wooden spoons

A couple of good long handle spoons will be handy. While you are cooking something that takes a little time. A long handle spoon is needed to keep from burning your self. I prefer wooden spoons because they do not transfer heat like a metal spoon will. If you don’t have one check the Dollar Stores, they might have just what you need and it is a dollar store so the cost is low. You might not these type of spoons, because you are happy with what you have already. No problem, use them.

Next stop for your list items is a good grocery store or whole foods market. I say good store because some of the very small grocers will not care a big variety of products and they might not have what you need for this project. They are great for other things, but for the best jelly or jam you need the variety of a larger store. A couple of hints now on making the best jelly or jam. Only use juice that is not from concentrate. Use real fruit juice for your jelly. Concentrate is mostly water and that is not what you want your jelly made from. Read the label!!!! Every thing you need to know is on the label of every bottle or jar or can and even bag in your store. Next is sugar. For the best results you want to use Cane Sugar. This is sugar from sugar cane and not sugar beets or something else. Cane sugar is by far the best. It doesn’t cost anymore than the other sugar. One more thing you will need is Pectin. Pectin is an item that causes your jelly to set up and sometimes even added to jam to make it thicker. We have tried all different types and companies for our pectin. We have found that our best was bought from Kroger and it was the Kroger brand. It was just pectin and not a big bunch of chemicals that was added to artificially cause your jelly to set up. Several other brands worked but the stores were not easy to get to. So we just used the Kroger because it was not far away. Check around, you will be surprised what you can find.

I know this looks like a lot to do, but it really isn’t, just do some with your every day shopping. It won’t take long and you will be ready to cook jelly! Don’t get discouraged, I know it looks like a lot of things to do, but it really isn’t. If your house is like many others stopping at a larger grocers is usual to pick up some of their special sale items. Thrift stores are checked out all the time to see what new has been added. So keep going it won’t be long till every member of your family is bragging on you because of what you made.

Canning Jars

Canning Jars

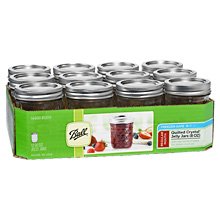
You have your juice, sugar, pectin, timers spoons and pot what have we left off? Maybe the most important item in making any canned product, the containers to put the jelly or jam in. You need real canning jars, not mayonnaise jars you have washed. The reason you don’t use left over jars is that  those jars will bust during the canning process. Real canning jars have special lids and rings to seal the jars. They are made just for this purpose, so spend the little that a case cost. The saving in worry and clean up is worth every penny.

Canning Pot and rack

Canning Pot and rack

Jar Lifter2

Jar Lifter

It is almost cooking time! We have one item left that you need. Many try to rig something up to work like this item but they usually fail. The item left is a canning pot and jar holder. The cost for these items are less than $10 and they last forever, almost.This is completely different from your cooking pot. This is a pot made to hold large amounts of boiling water with a rack inside to hold your jars while they process. The jar lifter is to remove jars after they have been processed. You can lift the jars and place them safely on a rack or towel to cool. Do not try to pick up a jar after it has boiled, you will burn your self and probably drop the jar and break it. Things you want to avoid.

Now you are ready! I am going to post Apple Jelly, but you can use any good juice that is not from concentrate will work. The choice is up to you. The Fruit Pectin that we use from Kroger has an insert with recipes and one of the recipes tells you the amounts to use from bottled juice. Check your package before starting because some juices need different amounts of sugar. Take a moment and save your self time and trouble. Jelly that doesn’t jell is a pain, it is just a mess. If you get this don’t throw it away because it works great on French Toast, Waffles or Pancakes. With that covered let’s cook.

Quickie Apple Jelly

Apple Jelly

Apple Jelly

Apple Jelly: 3 1/2 cups juice (sorry I left this out in my first published blog). 5 cups sugar, 1 package fruit pectin, 2 teaspoons real lemon juice. Combine juice, lemon juice and pectin. Bring to boil for 1 minute (time is important). Add sugar and bring back to boil for 1 minute or when the liquid drips from a wooden spoon in sheets. Carefully put into 8 ounce canning jars, fill till you get 1/4 inch from the top. You can use larger jars, but 8 oz. is most common. Next take a damp paper towel and clean the top rim. This makes sure you will get a good seal. Now place the dome on the rim (the dome should be sterilized in a small pot of boiling water. Now screw on the ring till it is finger tight (not too tight or too loose. Too tight and it won’t seal. Too loose and water will leak in and spoil your jelly). Process 10 minutes in boiling water bath with the water at least 2 inches over the tops of the jars. Make sure the jars are not touching the bottom of the pot, they will explode and ruin your whole batch as well as make a mess to clean. Well after the jars have boiled, remove them and place on a cooling rack or towel to set for at least 4 hours. While they are sitting you will hear a popping noise. That is the dome on top sealing. When the jars have completely cooled check to make sure all the lids are sealed. If they are not, the jar has to be reprocessed with a clean dome and a re-cleaned rim.

This looks like a lot of trouble, but it really isn’t after the first time. The next batch will be easier and the next easier still.

Also used for egg coloring at another time of the year

Also used for egg coloring at another time of the year

For a little fun, take food coloring and put a drop or two in the jelly before you seal it. Make sure you mix with a plastic spoon or regular spoon. You can make all different colors of jelly for picky kids that won’t eat store-bought. Make it purple or orange or green, what ever their favorite color is. They will eat it then.

The easiest jam you have ever thought of.

Quick and easy Strawberry Jam from Frozen Strawberries: In your grocers frozen foods section you will find frozen fruit of all types. Let’s start with strawberries because it is the number one flavor in most polls. Thaw the berries in your refrigerator in a bowl big enough to hold the container or bar. Open the bag or box and pour your strawberries into a colander that is sitting in a bowl. Let the berries drain till they stop dripping (stir the berries while they sit to speed up the process). Save the juice!!! Now you are ready to make jam.

Home made Syrup

Home made Syrup

With the juice you can make syrup. Just like the syrup you use on waffles of pancakes or even ice cream sundaes. I posted a blog all about making syrups from all types of juice. Check it out, but come back and finish this blog.By adding fruit syrups to the menu we have just about everything you would want. The blog post about syrups is: https://canucanit.wordpress.com/2013/05/08/50-shades-of-syrup/ just click on the link and you will be taken to the blog. Remember come back for the finish of this one.

Strawberry Jam

Strawberry Jam

Strawberry Jam: 6 cups strawberries, chopped. 1/4 cup lemon juice. 6 cups cane sugar. 1 package fruit pectin. Mix all ingredients except sugar, bring to boil, add sugar, bring back to boil. Carefully put in 8 oz jars. Follow directions about cleaning and placing the domes. Boil in a water bath 10 minutes. Remove, cool, check for seal.

In doesn’t get any easier than that! If you want a little variety mix in some ripe figs with your berries or use some Rhubarb. Maybe even some peaches or blueberries. You get the idea. Just keep the same proportions in the recipe and you are home free.

Remember I said to save the juice from the drained strawberries. This juice  will make great syrup. Just put it in a zip lock freezer bag and save till you get a few cups and make Pancake or Ice Cream Syrup. It’s easy.

Strawberry Syrup on Pancakes

Strawberry Syrup on Pancakes

Strawberry Syrup: 6 cups of Strawberry Juice  (If you like bits of fruit in your syrup, you can use crushed fruit). 3 cups sugar. 3 cups light corn syrup. Combine all ingredients, bring to boil slowly. Stir and simmer for 3 or 4 minutes. Syrup is now ready for bottles or jars, which ever you decide to use.  Fill the jars or bottles to within 1/4 inch, clean the rims and place lids. Process for 10 minutes. Let cool, the bottles are ready to enjoy. or give for gifts.

Now the big question everybody ask, “How long do these Jams and Jellies stay good?” Well the answer is one that you will like, they last over a year. This is one of the reasons I suggest using 8 oz. jars and not 16 oz. If your house is like ours, things happen. Jars get dropped or spilled and even thrown out by mistake. If this happens the small jar is not a great loss. Just get a new jar from the shelf and every thing is back to the start.

Look around and you will find all types of Juice and frozen fruit to use in your canning. It won’t be long till your pantry looks like ours, wall to wall jelly or jam.

I know you have heard this before but just when I get going it is time to stop. Well if you like this blog and would like more ideas about making thing you buy in the store, let me know and I will do a whole blog about these type of items. Don’t be shy, share this blog with your Facebook Family of Friends. Re-Tweet my blog info. Pass the word around. You might be surprised to get a sample of what your friends and neighbors cook.

New Salsa HatDon’t forget to check out my new blog dedicated just to Salsa. I have recipes for make and eat as well as canning recipes. I will also tell you when a recipe is just for make and eat with a chip. The site is www.canusalsa.com Stop in and check it out. From the looks of the numbers not many are looking. Hard to believe with so many request for salsa recipes that you have not at least peaked. Well there is no time like now as we are at the end of this blog. Bookmark it in your computer, or better still subscribe and you will get new blogs e-mailed to you. While you are at it, subscribe to this blog also.

To make sure that you are keeping up with the latest from both blogs all you have to do is click the subscribe (on the Salsa page it says follow along) bottom on the right and fill in your e-mail address and every blog from that day forward will be sent to your mail box. Really makes it easier to read and keep up. You never know what will come up next. I say that because I don’t know what is next!

Don’t forget…. let me know what you would like to make or any ideas you have for the next blog. Also if you have any questions you would like me to try to solve. Just drop me a note at jellymanga@gmail.com.

Please feel free to SHARE my blog on Facebook or Twitter or even MySpace.com, or any place else you can think. I want to get as many people exposed to the good things as possible. So share and ask your friends to share, PLEASE.

They just might give you something that they made to say thanks for the share. Don’t keep my blogs a secret, pass the word on to your friends, neighbors and family members.Jellyman Hat

Don’t forget, if someone asks you can you can it?

Say YES I can can it.

Posted in Apple, Blackberry, Blackberry Jam, Blueberry, Canning Jars, Cinnamon Sticks, Citrus Fruit, Coconut, Cookies, Cooking, Cream Cheese, Home Made | Tagged , , , , , , , , , , , , , , , , , , , | 2 Comments

Salsa for Dessert????????

Salsa for Dessert????????.

I know this sounds totally crazy and even out of limits for me, but according to Wikipedia Salsa is the Spanish term for sauce.

That means a thick liquid that is eaten with or on food to add flavor to it according to the dictionary.

So with that in mind how about some different types of sauce to eat over some of your favorite desserts?

Posted in Home Made | Leave a comment

Are you ready for some Chutney??? What is a Chutney?

I am sure that there are many that have no idea what a Chutney is or where it is from. Well I am one of those people so I do what I always do when I need an answer….. I typed the name in my search line and hit enter. I was covered up with more information  than I could ever use. One of the things that showed was Wikipedia. They are my source for definitions and other semi-important things. It had a great description of Chutney::

Chutney's

Chutney’s

“Chutney (also called chatney) is an Indian word meaning sauce. It refers to a wide-ranging family of condiments from Indian cuisine/Pakistani cuisine that usually contain some mixture of spice(s), vegetable(s) and/or fruit(s). There are many varieties of chutney. Chutneys may be either wet or dry, and can have a coarse to a fine texture. The Indian word refers to fresh and pickled preparations indiscriminately, with preserves often sweetened. Several Indian languages use the word for fresh preparations only.”

There, I could not have said it any better. I realize that some of my relishes were really chutney’s and not relish. And some of my Chutney’s were really relishes. Well it is too late for me to change now. They were all sold years ago. I hope that the people who ate them did not confuse the name.

Now that we know what I am talking about, how about some ideas for chutney’s, a few recipes and ideas on how to use these chutney’s in eating and cooking.

I am going to start with our most popular chutney, Mango Chutney. We could never make enough to last more than a couple of shows. It takes a few steps in cooking, but the end results is well worth the effort. So with that said here is the recipe:

Mango Chutney

Mango Chutney

8 cups mangoes, peeled & chopped. 3 cups onions, chopped. 1 cup apples, peeled, cored, chopped (Granny Smith are best for this recipe). 1 cup golden raisins, chopped. 1 cup dark raisins, chopped. Yes, I mean two different types of raisins. They taste different so they are needed. 2 cups cider vinegar (important use cider in place of white vinegar for the taste difference). 2 1/2 cups brown sugar. 1/2 cup fresh grated ginger. In place of fresh ginger above you can use 1/4 cup dried chopped ginger or 1/8 cup powdered ginger. 4 tablespoons fresh lime juice. 2 tablespoons mustard seeds. 3 teaspoons celery seeds. 1 1/2 teaspoons salt, kosher or canning. 1/2 teaspoon ground cinnamon. 1/2 teaspoon cloves, ground. 1 teaspoon grated lime rind (do this before you squeeze to get best results).

Ball jars

Canning Jars

Add all ingredients into large pot. Mix while cooking. Bring to boil. Simmer 45 minutes to 1 hour. Stirring occasionally to prevent sticking. Also make sure that you mix completely so all the flavors blend with each other. Prepare your canning jars by making sure the are clean and dry. This does not mean straight from the box. Look inside the box and you will see all sorts of things. Dust is not the only thing collected. Wash your jars and if possible use your dish washer especially if it has a sanitizer option. Another important thing to remember. Do not use any jars that are from something else like Mayo or Peanut Butter. They are unsafe for home canning. They can and will bust when canning and processing. It might cost a little more buying jars, but safety is important. Do what is called a Hot-Pack.That means hot going into jars that are safe. Carefully ladle into 8 ounce canning jars. We use 8 ounce, but you can use any size that you have. Fill to within 1/4 inch of the top. This is very important! After all are filled take a damp paper towel and clean all the rims of the jars.

Canning pot with rack included.

Canning pot with rack included.

Uncleaned rims will not seal. Place a new dome, that has been rinsed in hot water, on the jar. Place a ring on the top and finger-tighten. That means do not over tighten. If you do the air in jar will not escape and your jar will not seal. Too loose and water will leak in and spoil your hard work. Process 10 minutes in water bath. The remove and set on a rack or towel to cool. After all have cooled, check for unsealed jars. They have to have new domes after the rim is re-cleaned. You can use the same ring, but new dome is a must.

You will enjoy this chutney with all types of meals or snacks at a party. Serve on a dish and spread on top of a soft cream cheese and a cracker. The same way you eat Pepper Jelly. But that is not the best way to eat Mango Chutney. If you take a Pork Roast and a crock pot and a jar of Mango Chutney, you have the fix-in’s for a great meal. Not familiar with the word fix-in, it is southern for getting ready and all other descriptions for that purpose. Well back to cookin’  (that is Southern also). Place your roast in your crock pot (not sure if that is one word or two), then pour your jar of Mango Chutney over the top. Place the lid on and turn on low. Go to work, the beach, or just hang around. By supper time you will only have to make rice or a side veggie. You are in for a special treat. The chutney has everything need to spice, flavor and season your roast. It makes having this chutney around in the cabinet in case you catch a case of the lazy and want to take the day off in the kitchen. Something else about this dish, if you have left overs,  awesome sandwiches can be made the next day or if you made enough, just nuke and make another side or salad and you have another great supper (that is Southern for evening meal, some parts call this dinner. That is the noon meal for us folks south of the Mason-Dixon line). Those folks are called Southerners, as well as other things.

Look how much we have covered and with just one chutney. We got to get busy and make another favorite. We were told by many that this is their favorite veggie/fruit mixture. Now really this one has two fruits, but we won’t tell if you don’t. (What you did not know a tomato is a fruit).

Apple-Tomato Chutney

Apple-Tomato Chutney

Apple-Tomato Chutney: This chutney is awesome on pork, but is great on chicken as a garnish to chicken roasted on the grill. Something about cooking chicken over charcoals or a gas BBQ makes it just a whole different taste than the flavor of something cooked in an oven. Yellow rice and the chutney as a side makes a delightful meal. Just get a piece of chicken and some of the chutney, you are in for a taste treat. Y0u can also serve this with Texas BBQ other-wise known as brisket. In Georgia we spell Bar B Que P-I-G, so that is a main difference between us and our friends in Texas. As long as it is good to eat! The recipe for this chutney: 2 1/2 quarts tomatoes, cored, peeled, chopped. 1 quart Granny Smith apples, cored, peeled, chopped. 2 cups cucumbers, chopped. 1 1/2 cups onions, chopped. 1 1/2 cups bell peppers, red & green – chopped. 1 cup raisin, chopped. 3 cups brown sugar. 1 cup jalapeño peppers, seeded, chopped. 1 dove garlic, minced. 1 tablespoon ginger, ground. 1 teaspoon salt, kosher or canning. 1 teaspoon cinnamon, ground. 3 cups cider vinegar. Combine all ingredients. Cook in large pot for 2 – 4 hours (until thick). Stirring occasionally. Us the same method as above for jarring and processing this chutney. In fact the directions for jarring and processing all home canning is the same. Get it right and you have no troubles. Try to take a short cut and you are in for big troubles. You take too much time getting everything together and cooking to take a bad shortcut and spoil what you made. Believe me, if there was a short cut, I would have found it. I didn’t.

Our next one goes against the definition of Chutney, sort of like our last recipe. This one is made from just one fruit, Pear. While it is made from just Pear, it is a favorite on many kitchens shelves all over the world. It is called Curried Pear Chutney. Don’t let the word curried scare you off. Curry doesn’t mean it is super hot of full of spices that does not taste good. Curry powder means (again I go back to Wikipedia).

Curry Powder

Curry Powder

“Curry powder is a spice mix of widely varying composition based on South Asian cuisine. Curry powder and the contemporary English use of the word curry are Western inventions and do not reflect any specific Indian food, though a similar mixture of spices used in north India is called garam masala. Curry powder is actually closer to the Tamil sambar powder, and the word curry is widely believed to be derived from the Tamil word kari,[1] variously meaning something like sauce, cooked vegetables or meat. In the western world, curry powder mixtures tend to have a fairly standardized taste, though a great variety of spice mixtures are used in Indian cuisine.”

See it does not say extra hot or extra spicy. Well back to my recipe.

Curried Pear Chutney

Curried Pear Chutney

Curried Pear Chutney: 13 cups pears, peeled, cored, chopped (I am talking about hard pears, not the soft pears you usually get in the grocery store). 2 cups brown sugar. 4 cups sugar. 3 cups golden raisins. 1/2 teaspoon dry mustard. 1 1/2 cups crystallized ginger, chopped. 1/2 teaspoon ground ginger. 3 tablespoons mustard seeds. 1/2 teaspoon ground cloves. 1 teaspoon ground cinnamon. 1 teaspoon ground nutmeg. 1 teaspoon ground allspice. 1 quart white vinegar. 2 teaspoons lemon zest. 3 tablespoons garlic – minced, or 2 tablespoons dried minced. 1/4 teaspoon salt – kosher or canning. 2 tablespoons curry powder (make your own, or get some from a friend or even buy it in the store). 1 1/4 tablespoon dried pepper flakes.

Cut up hard Pears

Cut up hard Pears

Mix all ingredients in pot, bring to boil. Cover and simmer for about 30 minutes (until pear pieces are tender). Follow instructions for jarring and processing. Another note, if you can’t find hard pears in your area, try to find pears that are not completely ripe. They are still firm and should work. It will just take less cooking time.

This chutney goes with just about everything. It has such a well-balanced flavor, you won’t find any trouble including it in your cooking and eating. Don’t tell someone it is Curried and they might not know.

Peach Chutney

Peach Chutney

Lastly I will finish with a chutney made for Georgia. I live there some this goes out to my friends and neighbors. You can try it anywhere, just use the biggest, firmest, juicy peaches you can find. You might have to go to a farmers market to find these. But you may get lucky in your grocers. Peach Chutney: 8 cups fresh sliced Peaches. 4 cups sugar and 2 cups brown sugar. the juice of a fresh lime. 2 teaspoons sweet onion (Vidalia is best) chopped. 3/4 cup golden raisins. 1/2 cup red bell pepper chopped. 1/2 teaspoon cinnamon, ground. 1/2 teaspoon ground cinnamon. 1/2 teaspoon ground cloves. 1/2 teaspoon ground nutmeg. 1/4 teaspoon mustard seeds. 1/2 teaspoon crushed red pepper flakes. 1/4 teaspoon salt, kosher or canning. 1/4 teaspoon finely ground black pepper (white pepper looks better if you have it). Combine in a large pot cook till the veggies are soft. Usually 30 to 45 minutes. Jar up and process as above. Chicken and pork works really good with this chutney.Even tried it on baked ham and enjoyed it. How can anything made from the best peaches tastes bad. I even tried some that leaked on the table-cloth and it still tasted good. Use this chutney for cooking or as a side garnish, either way works great.

Pork Chops cooked with Peach Chutney

Pork Chops cooked with Peach Chutney

For an extra special treat try this recipe. Use this and bake pork chops in the oven. Just pour over thick chops and wrap in aluminum foil. Make sure you have a tight seal in your foil. Cook til chops are done. Serve chops and chutney over white or yellow rice for a great southern treat.

Peach Chutney with Brie on toast.

Peach Chutney with Brie on toast.

Now you see why so many people love their chutney’s they are so many ways to use them or eat them. You can garnish a dish, cook a dish or serve with Brie or cream cheese as an appetizer or party treat. They last forever on your shelf. All you need to do is put left overs (if there is any) in the refrigerator in a tightly sealed container. They will absorb taste from other foods as well as add flavor to those same foods. So either way, keep them sealed.

I hope that you noticed that in all my recipes, I have not used really hot peppers. Now to some people bell peppers are hot. I am talking about Habanero or Cayenne peppers. Chutney’s have enough flavor without adding hot peppers. Now for someone who loves hot peppers, this is hard to do. but we did it. Now when you are cooking, if you get the over whelming urge to use hot peppers, go right ahead. This is going to change the final flavor. But if you want everything spicy hot. Go ahead and do it. But remember the age-old kitchen saying “once you put something in you can’t take it out.” This goes for peppers as well as salt. So remember that you can add heat at the table if you like. Someone else eating with you might not like the heat.

I know I keep saying this, but it is true. Seems like we just started and it is time to wrap it up. Hopefully you got some ideas to try in the future. Don’t be afraid to cook. Some of the worst mistakes made in kitchens become family favorites. Not all of them, but some of them. So experiment, you are the cook. Being the cook means you make the choices just how much to add or make. The only cooks that can’t cook are the ones that don’t imagine. People ask my how we come up with so many recipes. I tell them that it was easy, we just think of a taste or flavor and made something to match. It was not hard. Everything should be in your mind’s eye before you cook it. The more you think the better it gets. How do you think we got so many things to eat. Some one had to think them up and then cook their ideas.

Also don’t forget to check out my new blog dedicated just to Salsa. I have recipes for make and eat as well as canning recipes. I will also tell you when a recipe is just for make and eat with a chip. The site is www.canusalsa.com Stop in and check it out. From the looks of the numbers not many are looking. Hard to believe with so many request for salsa recipes that you have not at least peaked. Well there is no time like now as we are at the end of this blog. Bookmark it in your computer, or better still subscribe and you will get new blogs e-mailed to you. While you are at it, subscribe to this blog also.

To make sure that you are keeping up with the latest from both blogs all you have to do is click the subscribe (on the Salsa page it says follow along) bottom on the right and fill in your e-mail address and every blog from that day forward will be sent to your mail box. Really makes it easier to read and keep up. You never know what will come up next. I say that because I don’t know what is next!

Don’t forget…. let me know what you would like to make or any ideas you have for the next blog. Also if you have any questions you would like me to try to solve. Just drop me a note at jellymanga@gmail.com.

Please feel free to SHARE my blog on Facebook or Twitter or even MySpace.com, or any place else you can think. I want to get as many people exposed to the good things as possible. So share and ask your friends to share, PLEASE.

They just might give you something that they made to say thanks for the share. Don’t keep my blogs a secret, pass the word on to your friends, neighbors and family members.Jellyman Hat

Don’t forget, if someone asks you can you can it?

Say YES I can can it.

Posted in Apple, Apple-Tomato Chutney, Award Winning, Best of Show, Brie, Canning Jars, Canning Salt, Celery, Chutney, Cider Vinegar, Cooking, Cream Cheese, Curried Pear Chutney, Family Tradition, Food Preservation, Garlic, Ground Ginger, Hard Pears, Home Made, Hot, Hot Pack, Kosher Salt, Mango, Mango Chutney, No artifical ingredients, No preservatives, Old Fashioned, Peach Chutney, Peaches, Pears, Recipe, Red Onion, Tomato, Vidalia Onions, Warm Brie | Tagged , , , , , , , , , , , , , , , , , , , , , , , , , , , , , , , , , , , , , , , , , , , , , , , , , , , , , , , , , , , , , , , , , , , , , , , | Leave a comment

Jelly or Jam from What????

Horseradish

Horseradish

When you think of jelly you usually think of grape or strawberry or even mixed fruit. But how many of you think of making jelly from Horseradish or a jam from Tomatoes and  Basil? You can make jelly or jams from just about anything you have around your kitchen.

Cream Chesee on a Cracker

Cream Cheese on a Cracker

These jellies are not what you could consider toast and jelly foods. They are more cream cheese and a cracker or warm brie and a bagel bite or wheat thins.

Bagel and Cream Cheese

Bagel and Cream Cheese

When we had our canning business and traveled around the country doing shows we sampled many different products, and some of those were things you would never think of in the terms jelly or jam. We constantly had people standing with a shocked look on their face after trying one of those. I think the biggest shock was when they tried Horseradish Jelly. I told them that they had to imagine that they had a cracker with cream cheese on it before they tasted it. They eyes lite up and they all expressed a surprised look. They could not believe the flavor it had. We sampled Tomato-Basil Jam at a show and sold out of our supply in the first 2 hours of the show. We had planned on having enough for 3 days. Well now that I have told you a little background let’s get cooking. The canning process for all the things I am listing are all the same. Fill cleaned jars to within 1/4 inch of the top.
Cleaning jar rims

Cleaning jar rims

Clean the rim with a damp paper towel. Place a sterilized dome on top then tighten the ring finger-tight (that is just tight do not over do). If the ring is too tight air can’t escape during the boiling stage. If is not tight enough water leaks in and spoils your product. So just finger-tight. Boil the jars in a boiling water bath for 10 minutes. Start the time when the water comes back to boil after the jars are carefully place in the pot. Make sure that the jars don’t touch the bottom, if they do they will crack. After boiling remove and place on a rack or counter top till completely cool. Check for jars that don’t seal, they must have a new dome after re-cleaning. Then reprocessed. This process is the same for almost everything I talk about so don’t get annoyed with my repeating the process. Not everybody reads the previous blogs. I don’t want them to do something wrong and spoil their work.

Jars of Prepared Horseradish

Jars of Prepared Horseradish

First I will start with Horseradish Jelly: 4 cups white vinegar. 1/3 cup fresh horseradish that has been trimmed and chopped finely. You can buy refrigerated horseradish in jars, this way you don’t have to be peeled and cut up fresh. They both work out great.r4 cups apple juice (not from concentrate). 10 cups sugar. 2 packages powder fruit pectin. 1/4 teaspoon canning salt (not table salt). Blend Horseradish with either vinegar or apple juice in a blender (not food chopper). Mix Vinegar, Horseradish, Apple Juice, Fruit Pectin, and Salt together and bring to a boil. Add Sugar and bring back to a boil. Check to make sure the jelly is getting to the stage where if sort of drips slowly from a wooden spoon. If not then more sugar, but only if necessary. Pour in jars and follow instructions above. This is a jelly that does not set up hard like you are used to, it is a semi soft jelly. So don’t be worried if yours is not firm. Serve chilled with cream cheese or warm Brie. Wonderful along side pepper jelly at a party. Make sure that you tell people the difference so they will not mix them up. We did not add food coloring so the jelly will almost be clear. Now how about a really different one

Purple Grape Thyme Jelly

Purple Grape Thyme Jelly

Grape-Thyme Jelly: Make a herb infusion using 1 cup dried herb, 6 cups grape juice. Bring juice to boil, then pour over herbs. Let sit overnight. Strain herbs from juice. This is your herb infusion for making the jelly with. I used Welch’s Grape Juice for the jelly. I loved the grape flavor. If you have another favorite, use that one. One of the things I like about Welch’s is that it has no added sugar so it works great. This jelly is great on a cracker but also really good with a pork roast.

Vidalia Onion Jelly

Vidalia Onion Jelly

Next is Onion Jelly: When you chop Vidalia onions for other uses, set the chopped onions in a strainer and let sit for a while, the juice that collects in the bottom of the container is onion juice. This is what we use to make the jelly. 1 cups white vinegar. 1 1/2 cups onion juice. 1 1/2 cups apple juice. 6 cups sugar. 1 package fruit pectin. 1/8 teaspoon canning salt. Mix all juices with powdered pectin and salt. Stir and bring to a boil add Sugar and bring back to a boil. Check to see if it is jelling add more sugar if necessary. This is another party jelly. We added yellow food coloring so they it would be different from Horseradish Jelly.

Garlic Jelly

Garlic Jelly

Our next one is Garlic Jelly: 1 cup garlic – minced small. 4 cups white vinegar. 3 cups apple juice. 2 packages fruit pectin. 14 cups sugar. 1 teaspoon citric acid. 1/4 teaspoon salt, kosher or canning. Put vinegar, garlic and apple juice in a blender and puree’ til hardly garlic pieces are as tiny as possible. Combine all ingredients except sugar in large pot. Bring to boil for 1 minute, add sugar and bring back to boil for 1 minute. Before you put on the lid to seal the jar, again take a plastic spoon and stir the jelly. The garlic pieces tend to float and more than likely they will be on the top of your jelly. This happens, so don’t get upset. Great with cheese, but also good to rub a chicken with before your cook it on a rotisserie. Gives skin a nice little flavor and a beautiful color.

Tomato Basil Jam

Tomato Basil Jam

Next is Tomato Basil Jam. This is the one we sampled and sold out in a hurry. I believe it will become a staple in your party and other events cook book. It is easy and does not cost much. Both big factors today. Tomato-Basil Jam: 3 1/2 cups tomatoes, crushed. 3 tablespoons basil, fresh or dried basil. 1/4 cup lemon juice (not from a bottle. Buy frozen juice it is sold at most grocery stores today.) 3 cups sugar. 1 package fruit pectin. Combine all ingredients, simmer til jelly stage. Notice I said simmer not boil. Boiling will lead to sticking and burning. Simmering is much easier to handle. We use this at parties, but also in cooking. Mary Lynn uses it sometimes over meat loaf. She also uses it on pork chops.

Kiwi Pepper Jelly

Kiwi Pepper Jelly

Up next is a variety of pepper jelly. I gave you the directions in an earlier blog https://canucanit.wordpress.com/2011/05/14/can-u-can-it-6/. If you go back and read, please come back for more things to  make.

Kiwi Pepper Jelly: Make pepper vinegar fusion. 1 3/4 cups pepper vinegar. 1/4 cup jalapeño pepper vinegar. 2 cups apple juice. 6 cups sugar. 1/2 teaspoon canning salt. 1 package fruit pectin. 1/4 teaspoon citric acid 2 drops food color, red or green. 1/2 cup kiwis, peeled, chopped. Combine ingredients in a large pot except sugar, bring to boil for 1 minute. Add sugar, bring back to boil for 1 minute. While jars are cooling stir gently to make sure kiwi pieces are throughout the jelly. Don’t use a metal spoon or utensil. Use plastic or Teflon to keep from damaging the glass jars. Use this along side your other pepper jellies at your parties.

If you make a jalapeno’ pepper infusion the jalapeño pepper vinegar will not make the jelly hot. It just adds flavor. Another jelly that is similar is Strawberry Jalapeno‘ Pepper Jelly:

Strawberry Jalapeno Jelly

Strawberry Jalapeno Jelly

4 cups strawberries, blended. 2 cups jalapeño vinegar. 2 cups apple cider. 1 teaspoon salt, kosher or canning. 3 packages fruit pectin. Combine all ingredients except sugar in large pot. Bring to boil for 1 minute, add sugar and bring back to boil for 1 minute. Along with the other pepper jellies on your party table. This one is a party favorite. Everybody loves the mixture of flavors. It will not last long, so have refills ready.

My last will be a herb jelly. to make this you will to make a herb fusion.

Basil Jelly

Basil Jelly

Basil Jelly: Make a herb infusion using 1 cups dried herb, 6 cups apple juice. Bring juice to boil, then pour over herbs. Crush the bail leaves to get the best tasting infusion. Let sit overnight at least.

Sweet Basil

Sweet Basil

Strain herbs from juice. This is your herb infusion for use in cooking. 2 cups herb infusion. 1/4 cup white vinegar. 4 1/2 cups sugar. 1 package fruit pectin. 2 drops food color (we like green). Combine all ingredients in large pot bring to boil for 1 minute. Add sugar, bring back to boil for 1 minute. Add food color to get color you wish. Add to a nice bagel with cream cheese for breakfast.

Plastic Spoons

Plastic Spoons

Another hint for getting the jellies or jams from the jar. Don’t use a metal knife, it might ding the jar or maybe even chip. Use a plastic spoon and you will never have that problem. We have told people this and they think we are crazy. But if you take a moment and think about it you will agree with me. Another thing about using a metal knife or spoon to take jelly from a jar, the metal will break the jell, causing you =r jelly to get runny. Think about all those jars of jelly you have bought in your life. The first is nice and firm, but after a few sandwiches the jelly starts to get a little loose. By the time you are at the bottom part of the jar you can pour your jelly out it is so runny.

I have given you a nice variety of things to make and enjoy many different ways. I hope you will make at least one of them, but hopefully you will make more than one to have for your parties. They add such a nice variety and difference taste. Your friends will be surprised when they try them. They will ask your for your recipe, because they want to make their our. Just give them my blog site and they will have many to choose from.

I also did not give you many ideas on how to use your herb or spice flavored jellies and jam. You can come up with your own ideas based on your family and friends eating habits. Some don’t eat pork or other meats. You can still make and enjoy these products in a variety of ways, things like making into a sauce that you can o=pour over other veggies, or like the garlic jelly rub on chickens. You can glaze a ham with the Kiwi Pepper Jelly for a tangy delicious ham. So get out your cooks hat or chefs hat and think!

I know you have heard this before but just when I get going it is time to stop. Well if you like this blog and would like more ideas about making things you buy in the store, let me know and I will do a whole blog about these type of items. Remember when you get closed in with winter weather you can still make great things in your kitchen.

Don’t forget…. let me know what you would like to make or any ideas you have for the next blog. I do take request. I don’t even have a “Tip Jar”. Don’t be shy and think that someone else will ask for the things you want made. 

New Salsa HatAlso don’t forget to check out my new blog dedicated just to Salsa. I have recipes for make and eat as well as canning recipes. I will also tell you when a recipe is just for make and eat with a chip. The site is www.canusalsa.com Stop in and check it out. From the looks of the numbers not many are looking. Hard to believe with so many request for salsa recipes that you have not at least peaked. Well there is no time like now as we are at the end of this blog. Bookmark it in your computer, or better still subscribe and you will get new blogs e-mailed to you. While you are at it, subscribe to this blog also.

To make sure that you are keeping up with the latest from both blogs all you have to do is click the subscribe (on the Salsa page it says follow along) bottom on the right and fill in your e-mail address and every blog from that day forward will be sent to your mail box. Really makes it easier to read and keep up. You never know what will come up next. I say that because I don’t know what is next!

Also if you have any questions you would like me to try to solve. Just drop me a note at jellymanga@gmail.com.  Please feel free to SHARE my blog on Facebook or Twitter or even MySpace.com, or any place else you can think. I want to get as many people exposed to the good things as possible. So share and ask your friends to share, PLEASE. They just might give you something that they made to say thanks for the share. Don’t keep my blogs a secret, pass the word on to your friends, neighbors and family members.Jellyman Hat

Don’t forget, if someone asks you can you can it? 

Say Yes I CanCanit

Posted in Award Winning, Bagel, Basil Jelly, Best of Show, Brie, Cane Sugar, Canning Funnel, Canning Jar Lifter, Canning Jars, Canning Pot, Canning Pot with Rack, Canning Salt, Cider Vinegar, Clove of Garlic, Cooking, Cooking Timer, Family Tradition, Food Gifts, Food Preservation, Garlic, Garlic Jelly, Gift Basket, Grape-Thyme Jelly, Home Made, Horseradish, Jar LIfter, Kitchen Timer, Kiwi Pepper Jelly, Kosher Salt, No artifical ingredients, No preservatives, Old Fashioned, Onion Jelly, Strawberry-Jalapeno' Jelly, Sweet Basil Jelly, Tomato Basil, Tomato Basil Jam, Vidalia Onions | Tagged , , , , , , , , , , , , , , , , , , , , , , , , , , , , , , , , , , , , , , | Leave a comment

How about a few more ideas for Winter Cooking?

After the last blog about cooking ideas for winter time, I have had more things suggested by Mary Lynn. These are things she does. This past week she bought a Boston Butt, she put it into a large crock pot and using the recipe that follows made an unbelievable bunch of meals. We used to use our Award Winning Apple Butter Bar B Que Sauce but we don’t have anymore and we don’t have a store to make more, so she invented a substitute and with that in fold her next step was to try it out in:

Pork Roast with Dried Apples

Pork Roast with Dried Apples

Sweet Apple Annie’s Pork Roast: Ingredients: 4-6 lb pork rump roast. 1 pint apple butter. 1 cup your favorite Bar-B-Que sauce (preferably one not too sweet). 1 cup (8 oz.) dried apples. 1 quart Apple Juice or Apple Cider. 1 qt ham broth (if unavailable use chicken broth, from your grocery store). 4-6 potatoes (red or golden with skin on). Mix all ingredients except roast and potatoes in a large crock pot. Brown pork roast on all sides in hot oil (be careful, Mary Lynn burnt herself doing this). Place roast into crock pot. Add as many potatoes as will fit. They can be cut in half if needed. Cook on high for 6 hours. Then cook on low for an extra 2-3 hours. You will smell the aroma when it is done. The broth is a sweet tasting soup. Do not waste this. Note: buy another roast that will fill your crock pot and reuse the broth.
Pulled Pork Sandwiches

Pulled Pork Sandwiches

Second day: Take remaining roast and pull apart using forks. Add extra Bar-B-Que sauce and serve on very good buns or rolls. Mary Lynn used Weber BBQ Sauce (the grill company). It was great! If there are any apples left, put a few on each sandwich. Now you have awesome tasting pulled pork sandwiches like you find in the best restaurants. Believe me when I say that this is so worth the effort. The first meal with the pork roast and potatoes with the sauce over the top is fantastic. But the Bar-B-Que pulled pork sandwiches is to die for. They are some of the best I have ever eaten. Coming from a person that has lived in a state were BBQ is spelled PIG, that is a big statement. I know that many believe that brisket is the only way to go, and it is really good, but pulled pork sandwiches with sauce severed with a dill pickle is just a little side of Heaven.

Pulled Pork with Slaw

Pulled Pork with Slaw

If you have some Cole Slaw to go with the sandwich and pickle try adding on top of the sandwich. It is really good.

(My own personal note. I am what many consider a “Hot Head”. That is someone who loves hot spicy food, the hotter the better. When I get a really good Bar-B-Que sandwich I always add hot sauce. I just do it to make it spicy hot. I use Tabasco Sauce if nothing else is available. But I prefer Texas Pete or Louisiana Hot Sauce. Those two are made with no or little salt. Tabasco is made in salt, and the extra salt on the sandwiches is not needed or wanted. So I like unsalted sauce the best. Try both types and you will see the difference. The choice is always up to you.)

Wow, what a one to start with! I will have to come up with a few more extra special ones to keep up with that one.

How about a fish recipe with a fruit salsa topping. It is out of this world.

Grilled Swordfish and Pineapple Salsa

Grilled Swordfish and Pineapple Salsa

Grilled Fish with Pineapple Salsa: Select some rather large fish fillets, usually Tilapia or Swordfish works best. Tilapia being the least expensive and usually the easiest to find. Preheat broiler or grill if you are setup to grill fish on yours. Line a baking sheet with foil. Brush 2 tablespoons olive oil (or Canola if you prefer) on both sides of fillets. Arrange fish on a foil-lined baking sheet and broil until fish is just cooked through, about 6 minutes. Transfer fish to serving plates and top with Pineapple salsa. Warm the salsa if you prefer, it doesn’t change the taste. The recipe for Pineapple Salsa and most any salsa that I talk about is found on my other blog site www.canusalsa.com and the link for this salsa is found at www.http://canusalsa.com/2014/10/09/hola-fruit-salsa-ole/ .

Now for something made with beef for those beef lovers out there. What could be better for cold days and nights than Beef Stew. But not just beef stew we are talking about BEEF STEW that will make your family and friends yelling for more.

Souped-Up Beef Stew

Souped-Up Beef Stew

Souped-Up Beef Stew: 2-3 pounds beef chuck or beef roast cut into cubes. 1 tablespoon olive oil (or Canola or other vegetable oil). 4-6 small potatoes (Red or Golden is best) cut into halves with the skin on. 2 cloves of Garlic peeled and crushed. 2 Carrots cut into small pieces (or use small Carrots like from a veggie tray).  2 Onions sliced into sections. 1 can green beans. 2 stalks of celery, diced. 3 Green Onions, diced finely with just a little green tops. 1 Bell Pepper seeded and chopped. 2 fresh tomatoes, peeled and diced (or a can of diced tomatoes). 2 cups beef stock (from grocers shelf). 2 tablespoons tomato paste. 1 teaspoon Ground Cumin Powder (my favorite flavor to make it taste really South-Western). 1 teaspoon hot chili powder (there is a difference). 1/4 cup Red Wine. Brown meat in a frying pan til brown on all sides. Place in a large crock pot. Put pan back on stove and add heat til you hear or see the sizzle. Carefully add 1/4 cup Red Wine and scrape the bottom till all the particles are free, add this to the crock pot. In a Cuisinart or blender add onions and peppers and tomatoes. Give this a rough chop, you don’t want too small of pieces. Add to crock pot. Pour broth and add potatoes and carrots. Add Salt and Fresh Ground Black Pepper to taste. Add other seasoning. Cook on high for 6 or 8 hours (till meat is tender and potatoes are dome). If you really want more heat, chop a couple of Chipolte Peppers and add to the stew at the beginning. This will add more flavor as well as heat.

Tex-Mex Cornbread

Tex-Mex Cornbread

To add another flavor to your meals try adding Tex-Mex Cornbread. If you have never tried this you are in for a real taste treat. Cornbread is a way of life in the South, it is something that you can find in most restaurants and homes. It is wonderful with most meals, even breakfast. My Grandmother would take cornbread left over from the earlier Supper and slice it down the middle and grill it with butter till it was toasty then served with more butter and syrup. I grew up eating things like that.

Muffin Style

Muffin Style

Tex-Mex Cornbread: Start by browning then drain 1 pound pork sausage (hot or mild, but hot has the most flavor. Mild gets lost). 8 ounces Monterrey Jack Cheese (or Mixture of Mexican Cheese) shredded. 1 onion that is diced real small. 1 bell pepper (use a jalapeno’ along with the bell for more flavor)that is stemmed and seeded and then diced into small pieces. 3 eggs. 1 stick butter (softened). 1 cup Sour Cream. 1 small can creamed corn. 1 1/2 cups cornmeal. 1/2 cup flour. 1 teaspoon baking soda. 1 teaspoon baking powder. 1 cup buttermilk (it makes a huge difference, but you can use regular milk in its place). Combine dry ingredients in a large bowl. Mix well. Add eggs, butter and milk and other wet ingredients. Mix completely. Add 1/2 cheese and sausage. Mix well. If you have a cast iron skillet use it other wise add to greased pie pans. Pour batter into pans. Now top with crumbled sausage then add cheese to cover. Bake in oven for 30-40 minutes in a preheated 350 degrees oven. Another way to cook is to use muffin tins. Pour batter into greased muffin tins and cook. It might be easier to serve and keep leftovers for breakfast this way. Some people like their corn bread sweet. I absolutely do not, and I think I am speaking for most Southerners. If you do prefer it that way add 2 tablespoons of sugar to the dry ingredients.

Mary Lynn made this last night, she had to substitute a few things due to none of what was listed. It still tasted great. One large chunk made a meal!!!

You have heard this before but just when I get going it is time to stop. Well if you like this blog and would like more ideas about making thing you buy in the store, let me know and I will do a whole blog about these type of items. Remember when you get closed in with winter weather you can still make great things in your kitchen.

Don’t forget…. let me know what you would like to make or any ideas you have for the next blog. I do take request. I don’t even have a “Tip Jar”. Don’t be shy and think that someone else will ask for the things you want made. 

Also don’t forget to check out my new blog dedicated just to Salsa. I have recipes for make and eat as well as canning recipes. I will also tell you when a recipe is just for make and eat with a chip. The site is www.canusalsa.com Stop in and check it out. From the looks of the numbers not many are looking. Hard to believe with so many request for salsa recipes that you have not at least peaked. Well there is no time like now as we are at the end of this blog. Bookmark it in your computer, or better still subscribe and you will get new blogs e-mailed to you. While you are at it, subscribe to this blog also.

To make sure that you are keeping up with the latest from both blogs all you have to do is click the subscribe (on the Salsa page it says follow along) bottom on the right and fill in your e-mail address and every blog from that day forward will be sent to your mail box. Really makes it easier to read and keep up. You never know what will come up next. I say that because I don’t know what is next!

Also if you have any questions you would like me to try to solve. Just drop me a note at jellymanga@gmail.com.  Please feel free to SHARE my blog on Facebook or Twitter or even MySpace.com, or any place else you can think.

I want to get as many people exposed to the good things as possible. So share and ask your friends to share, PLEASE. They just might give you something that they made to say thanks for the share. Don’t keep my blogs a secret, pass the word on to your friends, neighbors and family members.Jellyman Hat

Don’t forget, if someone asks you can you

Posted in Apple, Apple Butter, Apple Butter Bar B Que Sauce, Award Winning, Bar B Que, Bar B Que Sauce, Best of Show, Celery, Celery Sticks, Chipolte Peppers, Cider Vinegar, Clove of Garlic, Cooking, Dill Pickle, Dried Apples, Family Tradition, Food Gifts, Food Preservation, Garlic, Gift Basket, Green Beans, Holiday Cooking, Holiday Gifting, Home Made, Hot, No artifical ingredients, Old Fashioned, Pepper Sauce, Pickles, Plum Tomato, Pork Roast, Pulled Pork Sandwich with slaw, Pulled Pork Sandwiches, Recipe, Sauce, Tomato, Vidalia Onions | Tagged , , , , , , , , , , , , , , , , , , , , , , , , , , , , , , , , , , | Leave a comment

Winter cooking ideas for things to do

Winter Scene2

Winter


Winter

Winter

I know most of my readers are snuggled up warm in their house for winter. Got plenty of time to cook but no fresh fruit to cook. No problem, here are a few things that are tried and tested to be worth the effort! So make a list of things to get at the grocery store and get to cooking. Hungry mouths are waiting for something special that tastes great.

The first thing that comes to mind is apple butter mainly because cooking this will drive your family members wild with the aroma. Don’t want to hear how hard it is because it is not. Just a few simple steps to start and let your crock pot do the rest. It doesn’t have to be fresh apples. It can be made with apple sauce, but it has to be no-sugar apple sauce.

Crock Pot cooking

Crock Pot cooking

EASY APPLE BUTTER: 12 cups apple sauce (unsweetened, it says so on the label). 9 cups sugar. 1/3 cup cider vinegar. 3 teaspoons cinnamon. 1 1/2 teaspoons ground allspice. 3/4 teaspoon ground cloves. Mix all ingredients completely and pour into a large crock-pot. Cook for 10 – 12 hours, removing the lid for the last hour (this thickens the butter). While cooking, stir every few hours to make sure no sticking occurs. If you are really lazy use crock pot cooking bags found in your grocers with all the other baggie stuff. It is next to the turkey bags (which also work if you can’t find crock pot bags).

Sample size spoonfull

Sample spoonful

Try to keep spoons for sampling before it is done. While it is still warm from cooking try it on hot biscuits, toast and yes even pancakes or waffles or to really kick it up (I have heard that before) try it on ice cream. For a long time I would not eat syrup on my pancakes. I only used apple butter and not syrup. No special reason, I just love apple butter that much. Something about apple butter that makes it different from other toppings, you can rewarm it in the microwave. Don’t put the whole jar in, just put a couple of tablespoons in a small saucer and pop it in for about 15 – 30 seconds depending on your microwave. I say that because we recently had to buy a new one and the time the new one cooks anything is about half of the time our old one took. So try it 15 seconds, stir and taste. If it is hot, stop there and eat. If not 15 seconds more. Any longer and it might be time to buy another microwave.

Canning Pot. Worth the investment of less than $15

Canning Pot. Worth the investment of less than $15

If you want to put some up in canning jars, you will need real canning jars, domes and rings as well as a good canning pot with rack. Carefully ladle butter into clean canning jars filling to within 1/4 inch of the top. Take a damp paper towel and clean the rims (very important). Now place on a sterilized dome and add the ring. Finger tighten the ring, this means not too tight (no air escapes, jar won’t seal). Not tight enough and water leaks in and spoils your work. Place jars on rack and put into boiling water pot that has water at least 2 inches over the tops of the jars (necessary for a good seal). Boil the jars for 10 minutes then carefully remove and place jars on racks or towels. Let set a couple of hours. During this time you will hear a popping sound, this is the domes sealing. When jars are completely cool check to see if any did not pop, if you find some two choices: 1. Start over with the cleaning then a new dome, the old ring is OK. Reprocess in the water bath. 2. Place jar in the refrigerator and eat those jars first. I like #2 but that is just me. You have enough apple butter for a while, depending on how many hungry people are closed up for winter.

Frozen fruit

Frozen Fruit

In case you have never checked your grocery store freezer department, it might be stocked with all types of frozen fruit that is just begging for you to cook something with it. We have a company in a small town just North of were we live that puts all sorts of fresh fruits in a flash frozen bag. When thawed the fruit tastes almost like the fresh fruit you had back during the summer. In some cases it tastes better, because not all fruit is available everywhere. We have recipes for Peaches (https://canucanit.wordpress.com/2011/06/16/its-peach-time-part-1/), Strawberries (https://canucanit.wordpress.com/2011/05/27/strawberry-recipes/), Blueberries (https://canucanit.wordpress.com/2011/05/31/blueberries/), and Blackberries (https://canucanit.wordpress.com/2011/07/17/blackberry-time-at-last/), just click on the link and it will take you to the recipe. But you have to come back to see what else is going on. You can make jam or preserves or fruit syrups from all of them. No picking, no peeling, hulling or anything else. Just thaw in a colander set in a pan in your refrigerator. This is important, because when fruit thaws juice drips into the pan. Use this for jelly or syrups or just add to fruit when you cook it. As far as directions, just use thawed fruit in the same recipes I have given you over the past few years. Look up recipes in the archives of my site it is not hard (even I can do it). After cooking jams, jellies or preserves use the same canning procedure listed above for things that might last you till the spring thaw comes.

Jams, jellies and preserves or butters are not the only thing you can make from the fruit you find in your store. I will give you a couple of recipes  that we enjoy. One recipe our neighbor made and brought over. We tasted it and went crazy, it was one of the best peach cobblers we had ever eaten. So I will give you the recipe and tell you my neighbors name so when you taste, you will know who started this. I am also going to give you a recipe for a super desert that came from a craft show we did in West Palm Beach Florida.

Booth6

Outside at Yellow Daisy Festival

DSCF0002a

Inside at Columbia South Carolina

FlagBooth4

Inside at West Palm Beach

We used to travel all over with our setup and did indoor and outdoor shows from Miami to Washington D.C. and from Charleston west to the Mississippi River. We had invitations from other areas but could not do the trips to further away places.

Well on with the story and recipe for an exotic desert that is easy!!! The ingredients are apple butter, graham crackers, french vanilla bean ice cream. The utensils needed are a small ice cream scoop (like the ones used for melon balls, they make scoops the size of a quarter). First thing you need to do is make a whole bunch of melon ball size ice cream scoops and put on a sheet to freeze. Take some graham crackers and put into a small zip lock bag, crush the crackers with a rolling-pin or a small pot bottom. You will use the apple butter when you are going to serve the desert. Now the story of how this came about. We were doing a late spring show in West Palm Beach at the fairgrounds. One of our regular customers from Georgia shows stopped by and said that she had moved South. She was in trouble and needed a fancy dessert for a dinner party she was having. I told her to stop back in a while and let me come up with something. When she stopped back I told her to put a about a small amount of warm apple, depending on how many people you are serving. Allow at least 2 tablespoons per person. Heat in a microwave till it was hot (not bubbling),  into a small dessert bowl add the cracker crumbs then ice cream on top. This needs to be served immediately as it will all melt into a mess if you wait too long. She stopped back the next day and said the dessert was a huge hit. So big of a hit that she bought 4 cases of apple butter for use later. Sorry I don’t have any photos to show you they melted. She also said that more people raved about the desert than the dinner that she had cooked for hours.

The next dessert is the one from our neighbor Kim. She is Mary Lynn’s biggest buddy. They talk and message each other all the time. She made this one time while I was just home from the hospital and Mary Lynn had no free time to cook anything. Kim brought this over along with several other things to eat. She is that type of person, she brings us stuff all the time.

Kim's Peach Cobbler

Kim’s Peach Cobbler

Well now the desert, Kim’s Peach Cobbler: 1 box Duncan Hines moist butter cake mix. 2 cans Comstock brand Peach Pie filling. 2 cups sugar. 3 tablespoons ground cinnamon. 1 can Del Monte sliced peaches. 1 1/2 to 2 sticks butter cut into pats. Take some butter and butter the pan. Pour all the peaches into a long rectangular pan with high sides. Pour the dry cake mix over the peaches. Place pats of butter on top of the cake mix. Mix sugar and cinnamon and save. Bake peaches/cake mix pan on top of another flat pan to keep over flow from your oven. Cook at 350 degrees for about 20 minutes. Take out of oven and sprinkle the cinnamon sugar all over the top, make sure to cover the top well as this is where your top comes from. Return to oven for 45 minutes. Remove and check to see if your top is formed from sugar/cinnamon.

Kim's Peach Cobbler with Vanilla Ice Cream

Kim’s Peach Cobbler with Vanilla Ice Cream

If it is return and finish cooking another 10 minutes. Your peaches should be bubbling out the top. Remove, let cool to eating temperature. Serve with vanilla ice cream topping. It is absolutely awesome. You would never think that cinnamon would work with peaches. Well it does more than work, it goes crazy with peaches!!! If you don’t want ice cream (and I can’t figure out why), you can just scoop up a big batch of cobbler in a bowl. Great any way. How about whipped cream (the real stuff)?

Have not tried this with any other fruit, but keep watching and I will let you know if and when I do.

I know you have heard this before but just when I get going it is time to stop. Well if you like this blog and would like more ideas about making thing you buy in the store, let me know and I will do a whole blog about these type of items. Remember when you get closed in with winter weather you can still make great things in your kitchen.

Don’t forget…. let me know what you would like to make or any ideas you have for the next blog. I do take request. I don’t even have a “Tip Jar”. Don’t be shy and think that someone else will ask for the things you want made. 

Also don’t forget to check out my new blog dedicated just to Salsa. I have recipes for make and eat as well as canning recipes. I will also tell you when a recipe is just for make and eat with a chip. The site is www.canusalsa.com Stop in and check it out. From the looks of the numbers not many are looking. Hard to believe with so many request for salsa recipes that you have not at least peaked. Well there is no time like now as we are at the end of this blog. Bookmark it in your computer, or better still subscribe and you will get new blogs e-mailed to you. While you are at it, subscribe to this blog also.

Also if you have any questions you would like me to try to solve. Just drop me a note at jellymanga@gmail.com.  Please feel free to SHARE my blog on Facebook or Twitter or even MySpace.com, or any place else you can think.

I want to get as many people exposed to the good things as possible. So share and ask your friends to share, PLEASE. They just might give you something that they made to say thanks for the share. Don’t keep my blogs a secret, pass the word on to your friends, neighbors and family members.Jellyman Hat

Don’t forget, if someone asks you can you can it? 

Posted in Apple, Apple Butter, Award Winning, Best of Show, Bing Cherries, Blackberry, Blackberry Jam, Blackberry Preserves, Blueberry, Butters, Canning Jars, Cider Vinegar, Cooking, Family Tradition, Food Gifts, Food Preservation, Fruit Butters, Fruit Syrups, Gift Basket, Holiday Cooking, Holiday Gifting, Home Made, No artifical ingredients, No preservatives, Old Fashioned, Peach Cobbler, Peaches, Recipe, Strawberry, Strawberry Huller, Strawberry Shortcake, Syrups | Tagged , , , , , , , , , , , , , , , , , , , , , , , , , , , , , , | Leave a comment

Holiday cooking and gifting time!!!

Gift basket Fancy

Fancy

Gift basket Sweet

Sweet Gifts

Gift basket Simple

Simple gift

Gift basket Tasty

Gift Basket

Almost every family has a tradition of cooking certain things at this time of year. Most all are celebrating church holidays. Almost all are exchanging gifts with someone. Well I am going to change things up in your eating and gift giving ideas. Don’t stop making cookies, or fudge or whatever is your special item. But here are a few things that really don’t take long and are the kind of gift that everybody will look forward to. I know that home canned food gifts take longer than say a set of ear rings in a small box with a bow, but the food just might be a favorite. When you give someone food verses a store bought item, the food says that this is something for your family to enjoy. It is different!

Supplies for cooking

Supplies for cooking

Supplies 2

Supplies for cooking

Now you have to decide what to make. Apple Butter is always a hit, maybe pepper relish or jelly with a recipe to turn your sugar cookies into a jelly cookie. Maybe your have something you have made earlier in the year. Whatever way you go, get busy and get everything you need in one trip to the store. Make a list:

just the right tools for canning

Just the right tools for canning

Ball jars

Canning jars

Canning jars, sugar, pectin, fruit or juice to make jelly with. Or if you are doing a relish, all the items you need for the relish. Butters need fruit, sugar and spices as well as a big crock pot. You might pick up a few other little items that will make your work easier.

Canning pot with rack included.

Canning pot with rack included.


A real canning pot and rack and a jar grabber and blades for jar bubble removal if your are doing relish or pickles. These items are usually found in the same spot you found the jars. If not you will find everything you can think of in a old fashioned hardware store, not one of those mega stores that takes 30 minutes to find someone to ask where something is.


Supplies laid in now the fun starts, cooking time.

Colored jars with straws still in

Colored jars with straws still in

Apple Juice

Apple Juice from apples not concentrate

The easiest thing to make is jelly because butters and relishes or pickles take much prep time. So lets start with something simple like Apple Jelly: I made the name different colors because with a little pack of food coloring we will make jellies all different colors. So pick up a pack that says Natural Food Dye or Coloring. I say natural because you don’t want anything artificial in the jars. In a large cooking pan add 3 1/2 cups apple juice (bottled will work, but make sure it is real juice not concentrate and water). 5 cups cane sugar (cane always works best in place of sugar that does not say cane). It says Cane Sugar on the package. 1 package of pectin (if you have a Kroger’s the store brand is the best! Check your store for food pectin vs chemical pectin. Last ingredient is 2 teaspoons lemon juice. Combine Juice, and lemon juice and pectin. Bring to a boil. Add sugar and bring back to a boil for  1 minute. Ladle the liquid into cleaned canning jars, filling to within 1/4 inch of the top.

Also used for egg coloring at another time of the year

Also used for egg coloring at another time of the year

Now open your food dye and place one or two drops into a couple of jars, open another color and do the same. Combine colors to get other colors. Add 1 drop red to 1 drop yellow to get orange. 1 drop red and 1 drop blue to get purple. After adding the drops take a straw and mix each jar. Rinse the straw between colors. Now you have a rainbow of apple jelly.

Take a damp paper towel and carefully clean the rims. Now place a sterilized dome and ring on the top. Finger tighten the rings (that means not too tight or not too loose). Place jars on rack and put rack into a pot of boiling water that covers the top of the jars by at least two inches (also important). Boil 10 minutes. Remove the rack and place the jars on cooling racks or dish towels. Let set for at least 3 or 4 hours. During that time you will hear a popping sound. That is the dome sinking and sealing. When completely cool check the jars to make sure all have popped. If you find some that did not, they have to be re processed. Remove the ring and dome. Throw the dome in the garbage, the ring can be used again. Re clean the rim and place the new sterilized dome on top and tighten the ring. Boil again for 10 minutes and cool. The last step in important. make a label for your jars. You can use the labels that come with the jars or make some on your computer and printer. It’s up to you. Be sure to put on the jars what the ingredients are, some people have food allergies!! Add a bow or put into a basket with other things and you have a gift that will make someone very happy.

Adding jelly

Adding jelly

Jelly Cookies: Now to make those sugar cookies or peanut butter cookies with jelly on the top. Make your cookies your usual way, from scratch or from the frozen food section, either ways works. Place on cookie sheet and cook in oven the right temperature. When the cookies are about 2 or 3 minutes from being ready, open the oven and pull out the sheet with the cookies. Take a damp spoon and make a pocket on the cookie top. Next take a small amount of jelly and fill the pocket. Place back in oven and finish cooking. When they are finished you have Jelly Sugar Cookies or Peanut Butter & Jelly Cookies. How about that, not hard from start to finish. I will agree that it has taken a little more time than I said, but not as long as going to the store and shopping for a gift and standing in those long lines.

Apple Butter Gifts

Apple Butter Gifts

Apple Butter was covered in one of my earlier blogs. Here is a link to it: https://canucanit.wordpress.com/2011/05/07/canucanit/ go back and take a look, while you are looking at older blogs look around in my blog files, I have over 50 other blogs that will give you great cooking idea to give or eat. Just click on a item or search in my blog role.

A Time of the Season means Time To Cook. Check it out because there are other recipes that go along with gifting. Many different holidays are happening this time of year, not just Christmas or Hanukkah. So many different friends or neighbors need a gift. Apple Butter fits in just about every bodies diet or foods to eat. So it is a perfect gift either in a basket with other personal items. Just put a bow on top and you have a great gift for your office. Low cost and everyone loves apple butter.

straw1

Jar Dollies

Gift Basket

A piece of fruit from the craft store

jardollie6

Can you make this?

jardollie1

A dollie and a piece of ribbon

jardollie3

A piece of wrapping paper and a ribbon or string

P1050057

Cloth and a string

Making gifts you need a few ideas how to wrap or fix your jars for a gift. It is not hard, just a small amount of cloth and scissors and a little twine or string. Here are some ideas on how to decorate your gifts. Try one and you will see just how easy it is to make your jar look like a gift. In case you have a Secret Santa gift to get, why not make it something you have made! It will be easy and fast just add a bow on top.


Well I have run out of space for this blog. The mail man/woman is coming. So I have got to cut this off. Seems like I  just get started good and boom the old word count at the bottom of my page says Too Many Words!!!!

New tower

New tower

Before I forget, I know it has been a very long time since my last blog, but I have a good excuse. My computer went belly up, it died a slow and painful death and with it many of the things I had saved to the wrong place (not on my external hard drives). I have two 1 terabyte hard drives that I use for music and photos and important documents. I would recommend this for everyone. Well anyhow, I bought a new tower and had to buy all new programs to go with my new operating system. Seems my ancient programs did not work very good with the modern computers. I am now back up and running while still learning.

Don’t forget…. let me know what you would like to make or any ideas you have for the next blog. I do take requests they are free, I don’t even have a “Tip Jar”.

Also if you have any questions you would like me to try to solve. Just drop me a note at jellymanga@gmail.com.  Please feel free to SHARE my blog on Facebook or Twitter or even MySpace.com, or any place else you can think.

I want to get as many people exposed to the good things as possible. So share and ask your friends to share, PLEASE. They just might give you something that they made to say thanks for the share. Don’t keep my blogs a secret, pass the word on to your friends, neighbors and family members.santa-hat

Don’t forget, if someone asks you can you can it? 


Reply                                Yes I Can Can It!


Posted in Apple, Apple Butter, Award Winning, Best of Show, Canning Jars, Canning Salt, Cider Vinegar, Citrus Fruit, Cookies, Cooking, Dollie, Family Tradition, Food Gifts, Food Preservation, Fruit Butters, Georgia National Fair, Gift Basket, Holiday Cooking, Holiday Gifting, Home Made, Hot, Hot Pack, Jar Dollie, Jelly Cookie, Key Lime Juice, No artifical ingredients, No preservatives, Old Fashioned, Preserves, Secret Santa Gifts | Tagged , , , , , , , , , , , , , , , , , , , , , , , , , , , , , | Leave a comment

Blog Problem

I hate that it has been so long since my last post. My computer, some how, caught a virus. I have a antivirus thru Uverse that did not protect me. My system was very old, it came with windows XP. So that should give you an idea of the age. Well anyhow, it did not survive the infection. I have a new replacement finally, a Dell tower with all the bells and whistles. It is setup for gamers, I only play Free Cell and Solitaire, so it came with super power and memory. I think it will take me a while to figure out the new windows and get everything set up. So maybe in a week I will have my new blog ready to publish. It will feature all kinds of things that you make this time of yeast. So it is going to be a All Star Special!
Please watch closely and say a little prayer for my learning ability on my new computer.

Posted in Home Made | Leave a comment